biên dịch lại OpenSSL 1.1 & NGINX 1.25 vì TLS 1.3 (CentOS 7), theo kịch bản mà bạn đã cài đặt trên máy chủ o phiên bản cũ openssl được liên kết với dịch vụ nginx.
Cụ thể hơn, để có thể kích hoạt OpenSSL 1.1.1t cho dịch vụ NGINX, chạy với phiên bản cũ hơn. OpenSSL 1.0.2k.
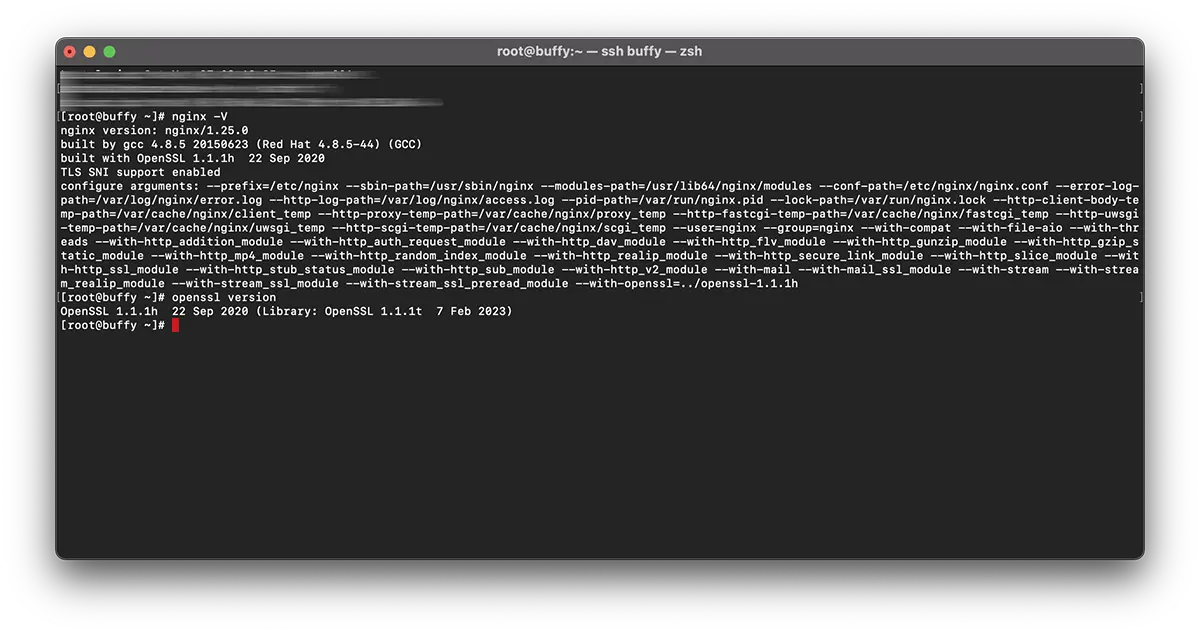
# nginx -V
nginx version: nginx/1.25.0
built by gcc 4.8.5 20150623 (Red Hat 4.8.5-44) (GCC)
built with OpenSSL 1.0.2k-fips  26 Jan 2017
TLS SNI support enabled
# openssl version -a
OpenSSL 1.1.1t 7 Feb 2023Điều này có nghĩa là có hai phiên bản khác nhau của OpenSSL. Một phiên bản được cài đặt trên hệ thống bởi “yum"(1.0.2k-fips) và một phiên bản OpenSSL được cài đặt bằng cách biên dịch thủ công (openssl 1.1.1t).
Thông thường, hầu hết khuyên bạn nên cài đặt lại 'OpenSSL' ở cấp độ máy chủ. Điều này sẽ đòi hỏi phải thực hiện lệnh: yum remove openssl. Nhưng có một vấn đề lớn ở đây. Với việc gỡ cài đặt phiên bản cũ OpenSSL, bạn cũng có thể cần gỡ cài đặt một số ứng dụng phụ thuộc. Chẳng hạn như: nginx, MariaDB-server, cerbotCộng với nhiều hơn nữa.
Một giải pháp đơn giản hơn là biên dịch lại openssl 1.1 & nginx 1.25 vì TLS 1.3.
Nội dung
biên dịch lại hướng dẫn OpenSSL 1.1 & NGINX 1.25 vì TLS 1.3 (CentOS 7)
Trong ví dụ của tôi, việc biên dịch lại là dành cho nginx/1.25.0 & OpenSSL 1.1.1h sử dụng hiệu sách OpenSSL 1.1.1t.
Biên dịch lại NGINX.
1. Tạo tệp: nginx-with-tls13-compile.sh
sudo nano nginx-with-tls13-compile.shnơi bạn thêm tập lệnh:
#!/bin/bash

## nginx
NGINX=nginx-1.25.0.tar.gz

if [ ! -f "${NGINX}" ];then
    wget https://nginx.org/download/${NGINX}
fi

ND=$(basename $NGINX .tar.gz)
if [ ! -d "${ND}" ];then
    tar zxvf ${NGINX}
fi

cd ${ND}

## pre require package
## yum install gcc pcre-devel zlib-devel

./configure --prefix=/etc/nginx \
    --sbin-path=/usr/sbin/nginx \
    --modules-path=/usr/lib64/nginx/modules  \
    --conf-path=/etc/nginx/nginx.conf \
    --error-log-path=/var/log/nginx/error.log \
    --http-log-path=/var/log/nginx/access.log \
    --pid-path=/var/run/nginx.pid \
    --lock-path=/var/run/nginx.lock \
    --http-client-body-temp-path=/var/cache/nginx/client_temp \
    --http-proxy-temp-path=/var/cache/nginx/proxy_temp \
    --http-fastcgi-temp-path=/var/cache/nginx/fastcgi_temp \
    --http-uwsgi-temp-path=/var/cache/nginx/uwsgi_temp \
    --http-scgi-temp-path=/var/cache/nginx/scgi_temp \
    --user=nginx \
    --group=nginx \
    --with-compat \
    --with-file-aio \
    --with-threads \
    --with-http_addition_module \
    --with-http_auth_request_module \
    --with-http_dav_module \
    --with-http_flv_module \
    --with-http_gunzip_module \
    --with-http_gzip_static_module \
    --with-http_mp4_module \
    --with-http_random_index_module \
    --with-http_realip_module \
    --with-http_secure_link_module \
    --with-http_slice_module \
    --with-http_ssl_module \
    --with-http_stub_status_module \
    --with-http_sub_module \
    --with-http_v2_module \
    --with-mail \
    --with-mail_ssl_module \
    --with-stream \
    --with-stream_realip_module \
    --with-stream_ssl_module \
    --with-stream_ssl_preread_module \
    --with-openssl=../$(basename $OPENSSL .tar.gz)

make

sudo make install

nginx -V
Lưu tệp mới.
2. Tạo tệp thi hành mới:
chmod +x nginx-with-tls13-compile.shviết lại nginx.service
3. Tạo bản sao lưu của nginx.service.
cat /lib/systemd/system/nginx.service > /srv/nginx_service.txt(bạn có thể chọn bất kỳ đường dẫn nào bạn muốn cho nginx_service.txt)
4. Tạo tệp cho dịch vụ nginx: nginx.service
sudo nano nginx.service5. Trong tệp có tệp mới nginx.service thêm các dòng:
##  /lib/systemd/system/nginx.service

[Unit]
Description=The NGINX HTTP and reverse proxy server
After=syslog.target network.target remote-fs.target nss-lookup.target

[Service]
Type=forking
PIDFile=/run/nginx.pid
ExecStartPre=/usr/sbin/nginx -t
ExecStart=/usr/sbin/nginx
ExecReload=/usr/sbin/nginx -s reload
ExecStop=/bin/kill -s QUIT $MAINPID
PrivateTmp=true

[Install]
WantedBy=multi-user.target
6. Sao chép tệp vào 'daemon".
sudo cp nginx.service /lib/systemd/system/nginx.service7. Sau khi tệp đã được sao chép, hãy cập nhật quyền của tệp bằng lệnh:
sudo chmod 644 /lib/systemd/system/nginx.service8. Tải lại cấu hình systemd để tính đến các thay đổi bằng cách sử dụng lệnh:
sudo systemctl daemon-reload9. Khởi động lại ngnix.
sudo systemctl restart nginxbiên dịch lại OpenSSL / NGINX vì TLS 1.3
10. Trong cùng một thư mục mà bạn có các tập tin nginx-with-tls13-compile.sh SI nginx.service, tạo một tệp mới: openssl-1.1-compile.sh.
sudo nano openssl-1.1-compile.shThêm kịch bản:
#!/bin/bash

## Compile OpenSSL
OPENSSL=openssl-1.1.1h.tar.gz

DONE=openssl-compile-done

if [ ! -f "${DONE}" ] ;then
    wget https://www.openssl.org/source/${OPENSSL}

    tar zxvf ${OPENSSL}

    cd $(basename $OPENSSL .tar.gz)

    ./config shared no-idea no-md2 no-mdc2 no-rc5 no-rc4 --prefix=/usr/local/

    make

    sudo make install

    cd ..

    touch ${DONE}
fi

export LD_LIBRARY_PATH=$LD_LIBRARY_PATH:/usr/local/lib64/

read -n1 -r -p "$(/usr/local/bin/openssl version) - Press any key to continue..." key

source ./nginx-with-tls13-compile.sh
Thay thế "OPENSSL=openssl-1.1.1h.tar.gz” với phiên bản bạn muốn cài đặt và biên dịch lại với NGINX.
11. Làm cho tập lệnh có thể thực thi được:
chmod +x openssl-1.1-compile.sh12. Chạy lệnh:
./openssl-1.1-compile.shĐợi quá trình biên dịch lại hoàn tất OpenSSL & NGINX.
Nếu chúng tôi có thể giúp bạn hoặc có những bổ sung được thực hiện, phần nhận xét sẽ được mở.